

Dometic RV Air Conditioner Manual: A Comprehensive Guide
Navigating RV appliance maintenance can be tricky; understanding your Dometic air conditioner’s specifics is crucial for optimal performance and longevity on the road․
Understanding Your Dometic RV Air Conditioner
Dometic RV air conditioners are designed for the unique demands of recreational vehicle living, offering cooling solutions tailored to mobile environments․ Unlike traditional home AC units, these systems often prioritize energy efficiency and lightweight construction․
Understanding the core components – the compressor, condenser, evaporator, and fan – is key to troubleshooting and maintenance․ The compressor circulates refrigerant, the condenser releases heat, the evaporator absorbs it, and the fan distributes cooled air throughout your RV․
Variations exist between models, impacting cooling capacity and features․ Recognizing these differences ensures you’re utilizing the correct procedures for your specific unit, maximizing comfort and extending its lifespan․ Proper operation relies on a well-maintained system․
Model Identification and Specifications
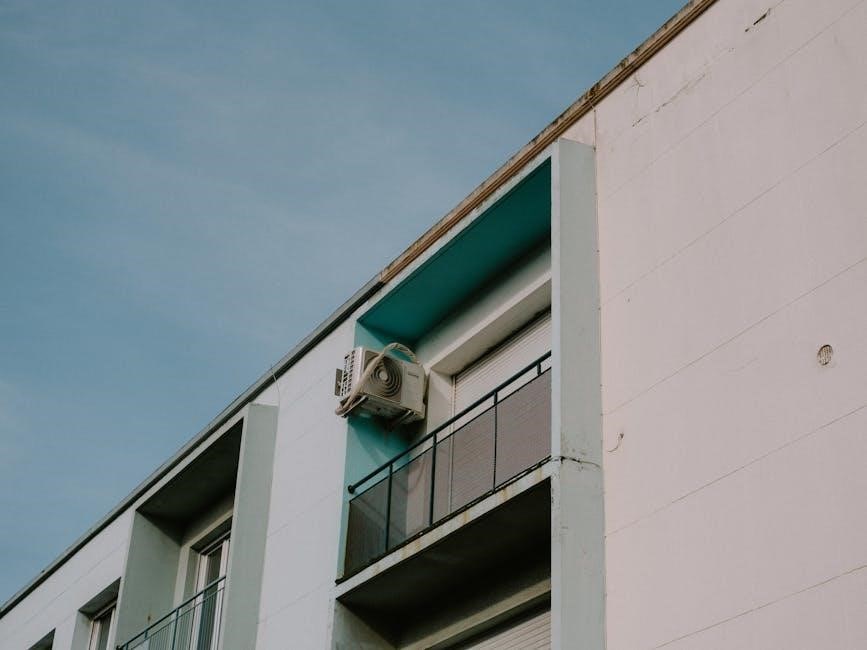
Locating your Dometic RV air conditioner’s model number is the first step towards accessing specific documentation and support․ This number, typically found on a label affixed to the unit’s housing, unlocks detailed specifications crucial for maintenance and repairs․
Key specifications include cooling capacity (measured in BTUs), voltage requirements (120V or 240V), amperage draw, and physical dimensions․ Understanding these parameters ensures compatibility with your RV’s electrical system and available space․
Dometic offers a range of models, from lightweight ducted systems to powerful non-ducted units․ Referencing your model’s specifications sheet will clarify its intended use and limitations, preventing potential damage or inefficient operation․ Accurate identification is paramount․
Safety Precautions and Warnings
Prioritizing safety is paramount when working with your Dometic RV air conditioner․ Always disconnect the power supply at the breaker panel before performing any maintenance or repairs to avoid electrical shock․
Never operate the unit with damaged cords or plugs, and refrain from using extension cords․ Ensure proper grounding to prevent potential hazards․
Avoid obstructing the airflow around the unit, as this can lead to overheating and malfunction․ Do not attempt to disassemble or modify internal components, as this voids the warranty and poses a safety risk․
Regularly inspect for leaks or unusual noises, and immediately address any concerns․
Installation and Setup
Proper installation is key to efficient operation of your Dometic RV air conditioner․ Ensure the roof opening is correctly sized and sealed to prevent water intrusion, utilizing appropriate sealant materials․
Verify the RV roof structure can support the unit’s weight before commencing installation․ Securely mount the air conditioner, following the manufacturer’s instructions precisely, and double-check all connections․
Confirm adequate clearance around the unit for proper airflow․
Before initial setup, inspect all wiring for damage and ensure correct polarity․ A qualified technician should handle electrical connections․
Always test the unit after installation to confirm proper functionality and airflow․
Proper Ventilation Requirements
Maintaining adequate ventilation is paramount for Dometic RV air conditioner performance and safety․ Restricted airflow significantly reduces cooling efficiency and can lead to overheating, potentially damaging the unit․
Ensure vents and intakes are unobstructed by luggage, debris, or other items, both inside and outside the RV․
Avoid covering the air conditioner with tarps or other materials that impede airflow․
Regularly inspect and clean vents to remove dust and obstructions․
Proper ventilation also helps prevent moisture buildup, reducing the risk of mold and mildew growth within the RV․
Following these guidelines ensures optimal cooling and extends the lifespan of your Dometic air conditioner․

Electrical Connection Guidelines
Correct electrical connection is vital for safe and efficient Dometic RV air conditioner operation․ Always verify your RV’s electrical system is compatible with the air conditioner’s voltage and amperage requirements – typically 110/120V AC․
Use a dedicated circuit for the air conditioner to prevent overloading․
Employ a heavy-duty, properly grounded extension cord if connecting to shore power, ensuring it’s rated for outdoor use․
Avoid using adapters unless absolutely necessary, and always choose a high-quality, appropriately rated adapter․
Never operate the air conditioner with damaged cords or plugs․
Consult a qualified electrician if you are unsure about your RV’s electrical system or connection procedures․
Operating Instructions
Before initiating operation, ensure proper setup and ventilation as detailed in previous sections․ Turn on the RV’s main power supply and locate the air conditioner’s control panel․
Begin by selecting the desired cooling mode – typically “Cool,” “Fan Only,” or “Auto․”
Adjust the fan speed to your preference, ranging from low to high․
Set the thermostat to the desired temperature; allow sufficient time for the unit to reach the setpoint․
Monitor the air conditioner’s performance and adjust settings as needed for optimal comfort․
Regularly check for any unusual noises or operational issues, addressing them promptly․

Control Panel Overview and Functions
The Dometic RV air conditioner control panel serves as the central hub for managing your unit’s operation․ Typically, it features a digital display indicating the set temperature and operational mode․
Key functions include power on/off, mode selection (Cool, Fan, Auto), fan speed adjustment (Low, Med, High), and temperature control via up/down buttons․
Some models incorporate a sleep mode for energy efficiency and quiet operation during nighttime․
A reset button may be present for troubleshooting minor issues․
Familiarize yourself with the panel’s layout and button functions for seamless control․
Refer to your specific model’s diagram for precise button identification and functionality․
Cooling Modes and Fan Speeds
Dometic RV air conditioners offer versatile cooling modes to suit various conditions․ The “Cool” mode actively lowers the cabin temperature using the compressor, while “Fan” mode circulates air without cooling – ideal for ventilation․
“Auto” mode intelligently adjusts cooling based on the set temperature and ambient conditions․
Fan speeds typically include Low, Medium, and High, allowing you to balance airflow and noise levels․
Lower speeds conserve energy and reduce noise, while higher speeds provide maximum cooling․
Experiment with different combinations of modes and speeds to find the optimal comfort level for your RV environment․ Proper selection enhances efficiency and extends the unit’s lifespan․
Thermostat Adjustment and Temperature Control
Precise temperature control is achieved through your Dometic RV air conditioner’s thermostat․ Digital models offer pinpoint accuracy, allowing you to set your desired temperature in specific degree increments․
Analog thermostats utilize a dial or slider for adjustment, requiring a bit more finesse․
Understanding the thermostat’s range is crucial; typically, settings span from 60°F to 85°F (15°C to 29°C)․
Avoid setting excessively low temperatures, as this can strain the compressor and increase energy consumption․
Allow sufficient time for the unit to reach the set temperature, and avoid frequent adjustments for optimal efficiency and consistent comfort within your RV․
Maintenance and Troubleshooting

Regular maintenance extends the life of your Dometic RV air conditioner and prevents costly repairs․ Proactive care includes routinely cleaning or replacing air filters – typically every 30-90 days, depending on usage and environmental conditions․
Inspect the exterior coils for debris and gently clean them to maintain efficient airflow․
If you encounter issues, start with simple troubleshooting: ensure the unit is receiving power, check the thermostat settings, and verify proper ventilation․
Common problems like reduced cooling, unusual noises, or water leaks require further investigation; consult the full manual or a qualified technician for complex repairs․
Filter Cleaning and Replacement
Maintaining a clean air filter is paramount for optimal Dometic RV air conditioner performance․ Dirty filters restrict airflow, reducing cooling efficiency and potentially damaging the unit․
Filters should be inspected monthly and cleaned or replaced every 30 to 90 days, depending on usage and dust levels․
Most Dometic filters are easily accessible, often located behind a removable grille․
For washable filters, gently rinse with water and allow to dry completely before reinstalling․
Disposable filters should be replaced with a new Dometic-approved filter of the correct size and type; always refer to your model’s manual for specific instructions․

Coil Cleaning Procedures
Regularly cleaning both the evaporator and condenser coils is vital for maintaining cooling efficiency․ Dirt and debris buildup impede heat transfer, forcing the AC to work harder․
Before cleaning, always disconnect power to the unit․
The evaporator coil (inside the RV) can be cleaned with a soft brush attachment on a vacuum cleaner․
For the condenser coil (outside unit), use a fin comb to straighten bent fins, then gently wash with a mild detergent and water solution, spraying against the fins․
Rinse thoroughly and allow to dry completely before restoring power․ Avoid harsh chemicals or high-pressure washing․
Common Issues and Solutions (No Cooling, Leaks, Noise)
Several issues can arise with your Dometic RV AC․ If experiencing no cooling, check the thermostat settings, air filter, and power supply․ A clogged filter is a frequent culprit․
Water leaks often indicate a clogged condensate drain line; clear it with a flexible wire or wet/dry vacuum․
Unusual noises – rattling, buzzing – could stem from loose components or a failing fan motor․ Inspect for obstructions and tighten screws․
If problems persist, consult a qualified RV technician․ Ignoring these issues can lead to more extensive and costly repairs, impacting your comfort on the road․

Winterization and Storage
Proper winterization safeguards your Dometic RV AC unit․ Before prolonged storage, thoroughly clean the air filter and coils to prevent mold and mildew growth․
Cover the exterior unit with a breathable RV air conditioner cover to shield it from the elements – snow, rain, and debris․
Ensure all water lines are completely drained to avoid freezing and potential damage․
Consider applying a protective coating to exposed metal parts․
Storing the RV indoors is ideal, but if outdoors, elevate it slightly to promote airflow․ Regular checks during storage will ensure a smooth start next season․
Preparing Your AC for Cold Weather
As temperatures drop, proactive preparation is key․ Begin by disconnecting the power supply to your Dometic RV air conditioner to prevent electrical issues during freezing conditions․
Remove the air filter and thoroughly clean it, allowing it to dry completely before storage․
Inspect the unit for any signs of damage, such as cracks or loose connections, and address them promptly․
Cover the exterior unit with a specifically designed RV AC cover to protect it from snow, ice, and debris accumulation․
This simple step can significantly extend the lifespan of your cooling system․
Long-Term Storage Best Practices
Proper long-term storage safeguards your Dometic RV air conditioner’s functionality․ After winterization, ensure the unit remains covered with a breathable RV AC cover, preventing moisture buildup and potential corrosion․
Periodically inspect the cover for wear and tear, replacing it if necessary․
If storing the RV for extended periods, consider elevating it slightly to promote airflow around the AC unit․
Avoid placing heavy objects on the roof near the air conditioner, as this could cause damage․
Regularly check for any signs of pest intrusion, sealing any potential entry points to protect the internal components․

Warranty Information and Support
Dometic stands behind the quality of its RV air conditioners with a comprehensive warranty․ The standard warranty typically covers defects in materials and workmanship for a specified period, often one year from the date of purchase․
Extended warranties may be available for purchase, offering additional coverage and peace of mind․
To validate your warranty, retain your original proof of purchase and register your product on the Dometic website․
For warranty claims or support inquiries, Dometic provides multiple channels, including a dedicated customer service hotline and an online support portal․
Detailed warranty terms and conditions can be found in the product documentation․
Dometic Warranty Details

The Dometic RV air conditioner warranty generally covers manufacturing defects for one year from the original purchase date․ This includes issues with components and workmanship under normal use․
However, the warranty does not cover damage resulting from improper installation, misuse, neglect, accidents, or unauthorized modifications․
Specifically, damage caused by power surges, improper voltage, or failure to follow maintenance guidelines will void the warranty․
Claims require proof of purchase and a detailed description of the issue․
Dometic may require the return of the defective unit for inspection․
Review the full warranty document for complete terms, exclusions, and limitations․
Contacting Dometic Customer Service
For assistance with your Dometic RV air conditioner, several support channels are available․ You can reach Dometic’s customer service team via phone during business hours, typically Monday through Friday․
Their website offers a comprehensive FAQ section and troubleshooting guides, often resolving common issues quickly․
An online contact form allows you to submit detailed inquiries and documentation․
Dometic also maintains an active presence on social media platforms, providing another avenue for support․
When contacting support, have your model number and purchase date readily available to expedite the process․
Detailed information and contact specifics can be found on the official Dometic website․